Saturday, January 7, 2017

Office Finishes in Gray and Cream (before and after)


OFFICE - "BEFORE"

Will's Office (before)
It was tough keeping the debris picked up while steaming wallpaper, repairing wall cracks, two skim coats of drywall compound, and sanding woodwork smooth . . . . all in preparation to apply paint finishes of gray and cream.   

Will Admires His New Office

Will and his son Dylan worked hours and hours to remove wallpaper on the office ceiling, and skim coat drywall compound to smooth.  More hours for the fine finishes involved to scrape paint flakes off the window trim and hand sand to smooth, then meticulous taping the 4 beautiful stained glass window in the office.  Repeat again--to prepare baseboard and wainscotting.

Here's the south window, scraped and ready for hand sanding and taping prior to painting

Before photo of the windows showing flaking paint to be scraped.  

Just remember: every job has a beginning, a middle, and an end. 


BEFORE
South East Corner of Office 

View from the living room, looking into the office as wallpaper was steamed away, and white Durabond and webtape wall repairs.

After those repairs, two skim coats of drywall compound applied and smoothed to perfect blemish free walls.  Then two coats of primer and two coats of Cloudy Today Gray satin finish.  The woodwork received two coats of semi-gloss in Pale Quartz.

AFTER
Southeast Corner of Office

A portrait of Benjamin Franklin greets visitors.  Notice the turn of the century stick and ball magazine rack.


Presently I'm making lined drapes for the 4 stain glass windows, and soon we'll have the rods hung ready to install the drapes.  The reason for the drapes is function first.  The winter sun penetrates the bay window and can be annoying.  

The drapes are simple panels, hung with ring/clips--easy to open and close.  The lining protects the drapery fabric from sun light fade.  And the lining keeps cold air out during the winter, and diminishes the heat in the summer time.  

After the window seat cushion is installed, then I'll have the right length (hem finish measurement) for the drapes.  

The drapery fabric is a Jacobean print, that compliments Will's antique Jacobean Style desk with its thick decorative legs and carvings in dark oak.  Check back with Will later--to see his drapes and window seat finished.
   
Dark oak furniture looks great in this room.  There is a small library desk (located at the south window) to hold Will's printer and WiFi.

Will was careful to protect his new carpet with pieces of cardboard--on the feet of his desk.    As I took this photo--he had just cleaned his beautiful old desk with Old English furniture polish.  Makes it shine and hides scratches.  

On his desk is a salvaged old lamp, rewired and fitted with a new but old looking glass shade.  It will be topped with a custom shade.  

I love to cover lampshades.  Here is a fancy one I made for my 1893 Victorian Farm House in Scandinavia, WI.  (I'm Will's sister Linda).


Antique Lamp on Will's Desk--waiting for a fabric shade  

On this day we were pulling tape off the windows and trim, and Will moved furniture into his office.    

"Before Photo" of Wall Repair above the office cabinet

Cutting Away the Crumbling Area . . . to make the repair

We run into all types of wall repairs: hairline cracks, medium cracks, fist size holes, and sometimes bigger areas that were crumbling.

This repair required cutting away a large rectangle of loose plaster.   Replaced with 1/2" thick drywall rectangle and screwed into the lath.  Webtape and Durabond to repair, and two skim coats of drywall compound to smooth.  Prime and Paint.  Done.


"After Photo" Repaired Wall - like brand new


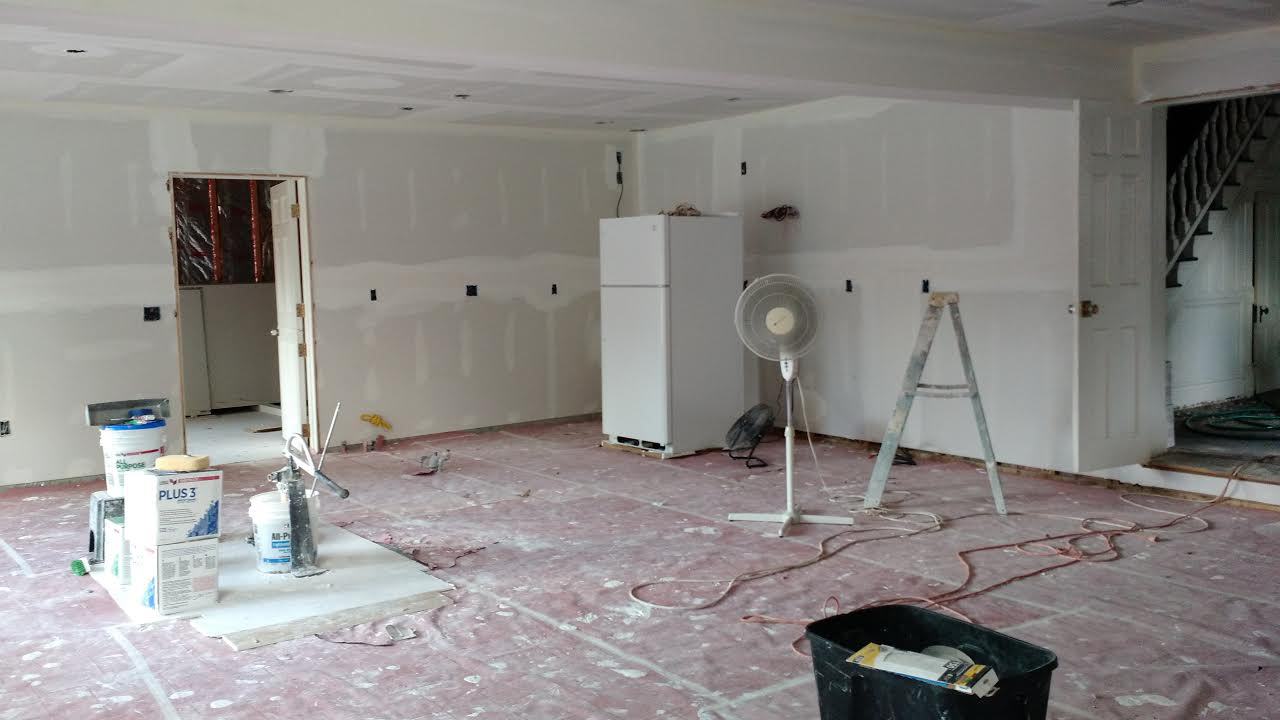
View from Will's Office--looking into the living room.  Believe it or not, the living room is more finished than it appears.  

The newly sanded, stained and sealed original floor is beautiful, but covered for the moment.  The walls and ceiling--all receiving last bit of skim coat drywall compound.  Almost ready for sanding woodwork, priming, and painting.  

The living room walls will be the color of coffee with cream.  The ceiling and woodwork in Pale Quartz the creaminess of a vanilla ice cream cone.  

The Living Room was once the hub of Dr. Alfred Carey's medical practice, post office, and his home in 1892 until he passed suddenly from appendicitis in 1899.  He no doubt loved his new home and wife Della who gave birth to their only son a month after his death.  

Here's a photo of the Will's Wild Rose house.  Quite possibly it is the original exterior as it was built in 1892.  The photo image was provided by Ann Garber who lived here with her siblings and parents. Recently, I ordered a print and framed it--a gift for Will and his home.  

16 x 20 framed print - Wild Rose House
***
Here's to 2017, and many great memories to come, as we roll up our sleeves and restore this old house.  

Stop by and visit us when you can.  We'll keep you informed when we open the doors for a tour during Wild Rose Days in the summer.

Thursday, August 4, 2016

Man Cave - Lower Level

This is my brother Will's  MAN CAVE (family room) 
 located in the lower level of the Wild Rose Victorian House. 

ELECTRICAL
Master Electrician Bill Rotta and his crew finished their work in the man cave last week.  New pot lights, new receptacles.  Great job.  Bill looks so familiar to me, then I realized he looks like a younger version of Mark Cuban, the billionaire.  He laughed when I told him that.

INSULATION
 Just days ago, my brother Will spent three days filling the wall cavities with insulation, then covered the insulated walls a clear vapor barrier.  Back in the day when our father Gale was a building contractor--he always referred to the plastic vapor barrier as visqueen.  I don't know if Visqueen was a brand name, but that term always stuck in our brains.  

DRYWALL and TAPING
The drywall/painting contractor JEREMY SIMON and his crew began work this week on the MAN CAVE.  Looking at the right of the photo you can see through the doorway, the stairs leading up to the older part of the Wild Rose Victorian House.  

Jeremy and his crew are doing a fabulous job.  It is perfection!

They are a well-organized crew.  Knowledgeable and steadfast--they get right down to their craft to produce excellence.  This complete turn from a dark cave to a first rate MAN CAVE is happening in only a few days time.  Oh my, what a beautiful job Jeremy and his crew did for Will.  

While talking to my brother Will by phone Tuesday night, he told me . . . you won't believe how beautiful it is.  Jeremy is making my MAN CAVE look so fantastic.  All that tough stuff of getting it perfect around the fireplace.  It is what it is, it's perfect.

Light fills the space.  To the left, the entire west wall are windows.  

 Pink paper protects the slate floors during the insulation/drywall process.


This is a neat tool!  Run, Jeremy, run.

Crew member Matt sands drywall mud to get ready for a knock down spray finish to happen on Thursday August 4 (today).  

After the drywall knock down finish--the walls and ceiling will be primed, followed by painting of the ceiling in off/white.  Wall color will be cut-in and painted by Will and me, but not until after he buys some living room furniture.  


While the contractors worked in the MAN CAVE yesterday --I was upstairs hand-troweling drywall mud over the wall crack repairs in the OFFICE.  That pretty room with the stained glass windows!

THE OFFICE:
Yesterday--the office upstairs was a toasty 90 something degrees plus two fans going while I worked.  I finished three walls (first coat of mud).  

The fourth north wall is mostly covered with book cases,  but has the most severe wall cracks to repair.  Jeremy is going to help me out with those, to minimize my work.  That's so nice of him to help me because it is a tough area for a short person like me to maneuver even with a tall ladder.  I have to reach up and over the tall cabinet to apply the mud.  

The second coat of drywall mud for the office I will do this weekend, then priming.  Also, I need to finish hand sanding woodwork, and then prime.  At that point, we can get down to the brass tacks of finishing the office in a grey and linen color scheme.  Abe, and Ben, and George think it's cool.

Abraham Lincoln
office artwork

Benjamin Franklin
Office - artwork

George Washington
Living Room over the fireplace mantle - artwork

My brother Will's move-in date is September 1.  Wow, that will be here before we know it!


Monday, July 11, 2016

Weekend Work on the Wild Rose Victorian

West Wall/Ceiling

SATURDAY WORK - JULY 9, 2016

Spinning my camera around the perimeter of the room . . . Brother Will trowels on 2nd coat of drywall mud--getting the ceiling smoother with each pass . . .

 Southwest Corner

 Southwest Corner - Abe, Geo, and Ben watched and applauded Will's ceiling work.

North wall/ceiling and the big yellow rolling scaffold.  You have to be limber (like a monkey) to climb the big yellow beast.

North wall/ceiling
See the bottle of water to the right sitting on the scaffold.  Will uses it to keep his trowel working the drywall mud smooth and clean.

Will stops to clean his pan and trowel between batches of mud.  He's so picky--but then again he owns a commercial and residential cleaning  business, Amazing Cleaning Services.  He wears a lot of his business T-shirts "Be Amazed" ACS Amazing Cleaning Services 715-570-2497.

I am a short person, 5'1" so it takes a big ladder to get to the high spots--taping the vestibule.  Last month I was on a shorter ladder and fell.  On a short ladder--it is easy to over-extend, but it also has to do with wearing bi-focals.  Easy to miss-judge that last step climbing down.  Ooops!  

 A person can get kind of silly when doing repetitive work like this.  My silly thought is this:  I like the green web tape.  My next favorite is blue web tape, and my least favorite is white web tape.  There is no difference other than color--but when I take photos the green tape shows up better.  
I like green tape.

You may have noticed the 2 shallow closets with louvered doors on either side of the stained glass window to the right.  Will decided they will stay put.  There is no other spot for hanging up a coat or two, so these two closets have some good function.  


While my brother Will troweled the living room ceiling, I stayed out of his way and worked on the taping hairline cracks, and washing away excess glue film off the walls.  

Northwest Corner of Vestibule

Second half of Saturday workday--troweling on Durabond 90 hand mixed mud over the web tape to make a smooth repair.

Front Door View - Inside the Vestibule

Southwest Corner of the Vestibule

Stained Glass Window in the Vestibule

Wall Repairs in area below chair rail - Vestibule

The big yellow scaffold parked in front of the living room doorway.  Will temporarily removed the second stained glass door (vestibule to living room).  This helps me get in and out of the vestibule with my tall orange ladder.

Will works evenings on the house until 8:00p.  The first month of work is history--went through 3 bags of Durabond 90 and 3 rolls of web tape to repair cracks in the living room, office, and vestibule. 

***
The weekend of July 23-24 is Wild Rose Days.  We'll be at the Victorian working, and there will be a sign at the front door to let you know we'd like you to come in and see the restoration progress.  Bring your own cold soda, camera, and watch us work.  


Saturday, July 9, 2016

Little Things Mean A Lot

Just inside the front door--attending the wall cracks with web tape and still damp Durabond 90.  As the repairs dry it will turn completely white.  We worked half day--finishing lower walls in living room, and vestibule.  

Moving right along with wall repairs.  The green web tape roll sitting next to the baseboard.  
My tools are: a trowel, pan of Durabond 90 mud, scissors, and web tape.  We have a little garden trolley to sit on and it is just the right sitting height to do the lower work.  

Here is a close up photos of the wall wall surface in the vestibule, and the double fist size repair--filling bit by bit with Durabond 90.  This is first fill.   

Not a great photo--but this is second fill of the hole--with surround web tape and wet Durabond 90 as we just finished.  In future photos--you'll see the hole slowly disappear completely.

When we steamed away wallpaper--there were vulnerable areas where our scrapers went deep into the original plaster.  Some wallpaper layers were painted over and became glued down tight.

Those deeply scraped areas close to the all the moldings were reinforced with web tape repair.  Takes more time, but is the very best repair.  We are using web tape and Durabond 90 in the corners too to strengthen.


None of this is pretty to the eye at this point.  But, for us--it is warming assurance.  Like a sculptor as he begins chipping away at a big block of stone, eventually its beauty is revealed.


How much time does it take?  Lots and lots of hours.  More than we want to calculate.


I remind myself that after the wall crack repairs, comes the smooth resurfacing of the walls with pre-mixed drywall mud--skillfully hand troweled not once, but twice.


Then cleaning of woodwork, sanding woodwork, and cleaning a second time.  It is a chance to smooth out layers of previous owners' paint and dribble mistakes.


A coat of priming paint over ceilings, walls, and woodwork.  Windows--the old ropes, weights, and reglazing windows--is a whole different project on its own with lots of steps.


Painting ceilings, walls, woodwork.  Will it be September 1 when we get this done?  Probably.

***
The boy are here!

Canvas portraits arrived today.  We put Abe, George, and Ben on the mantle to view and assist in choosing colors for the main wall color, and frieze.


From the far right--counting backwards to the lightest colors,
we selected 3 and 4 in an eggshell finish.


Number 3 (darker of the two) is called Highlight and it will be the main wall color in the living room.

Number 4 called Polished Marble will be the frieze color.


Pale Quartz (not shown), is an off white for the flat finish ceilings, and semi-gloss for the woodwork.  
Before we started the living room and office--I purchased drapery fabric for the living room and office, and from my own things--I donated an antique sofa upholstered in a supple gold chenille, pattern accented in black.


My rule of thumb for decorating is to FIND the drapery fabric first--it is the hardest thing to OBTAIN.  I will be sewing the drapes--custom fit for the windows and paying great respect to the beautiful of the stained glass windows in the office and vestibule.  

***
Will met with the drywall contractor Jeremy--to address new ceilings and walls in the modern addition of the house.  Then, Will worked on installation of new brass door knob for the front wooden screen door.  And added cap and finial to handrail posts at the front steps.  Cool.


Will installs new door knob assembly.  Afterwards he had to reposition the new strike plate on the door frame.  It worked perfectly and we both giggled with excitement.


So nice to have a working door knob at the front door.  The rock holding the door shut was getting a bit annoying.


Will installed replacement post cap and finial 

When we get going on the inside with Zinzer 1-2-3 indoor/exterior primer, we'll get the front handrails scraped and primed too.  Every job doesn't look like it will take much time to do, but isn't it amazing how one or two little jobs turn into a half day's work?

Thank you for following the Wild Rose Victorian House restoration journey.  We'll continue to post photos and updates every day we work on the house.  If you want to see things speed along . . . . well, I guess you'll just have to come by and help us move along faster, eh????

I saved a trowel and paint brush for you.  I put your name on it, and set it beside the tool box.  Hint, hint.